Food Train Instructions
Here are some instructions for creating a food train for a train birthday party.
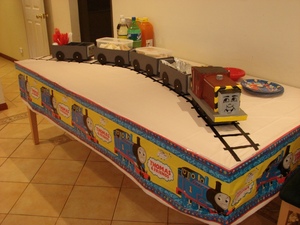
It will turn out looking a lot like this:
The Carriages
For a basic carriage you will need:
- Strong Cardboard - 40x36cm per carriage (I used nappy boxes)
- Masking Tape
- Split Pins (4 per carriage)
- Paint
- Scissors
- Stanley Knife
Instructions:
- Cut out the below shape/size from the cardboard.
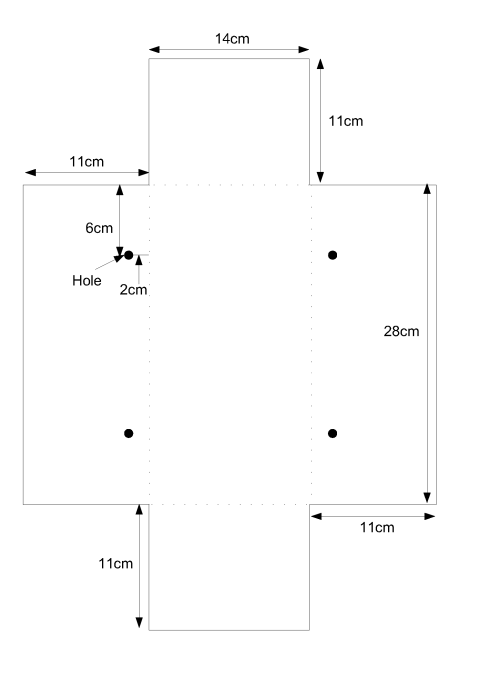
- Use the scissors to make holes in the sides of the carriage for attaching
the wheels later.
- Score along the dotted lines.
- Fold along the score mark (you will need to
fold away from the side that you scored) to make a rectangular box (without a
lid).
- Use the masking tape to hold the box in shape.
- Next cut four 8cm diameter circles out of cardboard and put holes in the centre of the circle.
- Paint the box your desired colour - when we did it we were going for the troublesome trucks so we selected a dark gray colour.
- Paint the wheels your desired colour.
- Allow the paint to dry.
- Use the split pins to attach the four wheels to the carriage.
Optional Bits
Paper Mache
If you use cardboard that is "shiny" you will probably have trouble painting
it. To overcome this I put a layer of paper mache on the carriage after step
5, and let it dry before painting it. I would recommend using a matt cardboard
box if you can; it will save you a lot of time!
Troublesome Truck Face
Since we were trying to make a Troublesome Truck it needed a face. To do this you will need:
- Black permanent texta
- 11cm x 9cm bit of cardboard
- Light grey paint
- White paint
- Craft glue
Instructions:
- Take the 11cm x 9cm bit of cardboard and paint it grey (the grey needs to be lighter than the grey you used for the carriage).
- Wait for it to dry.
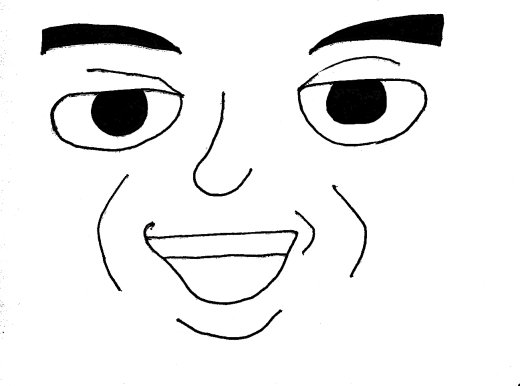
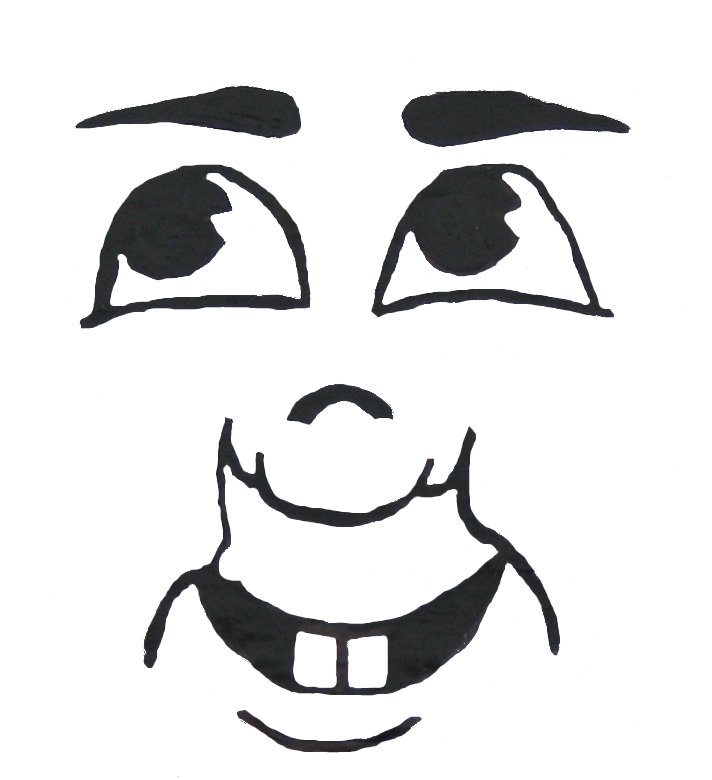
- Use the texta to draw on a troublesome truck face (example).
- Use the white paint to colour the teeth white.
- Use the craft glue to stick the face onto the front of your carriage.
Joining the Trucks
My son is very particular about anything train related and he pointed
out that the trains were not "coupled". To create coupling we used:
- Curtain wire (approx. 30cm)
- Screw hooks (2)
- Gaffer tape
Instructions:
- Screw a hook into each end of the curtain wire.
- Use gaffer tape to attached the wire to the bottom of the truck - the hooks should overhang on each end.
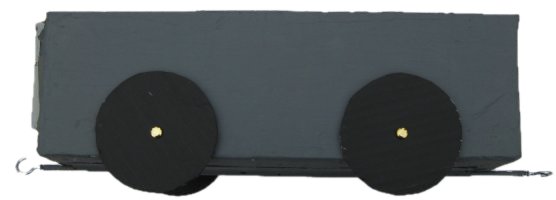
Here is a close up of the finished truck:

The Engine
To create "Salty" you will need:
- Strong Cardboard
- Masking Tape
- Paint
- Scissors
- Stanley Knife
- Craft Glue
- Black Permanent Marker
- Newspaper
- Paper Mache glue
Instructions:
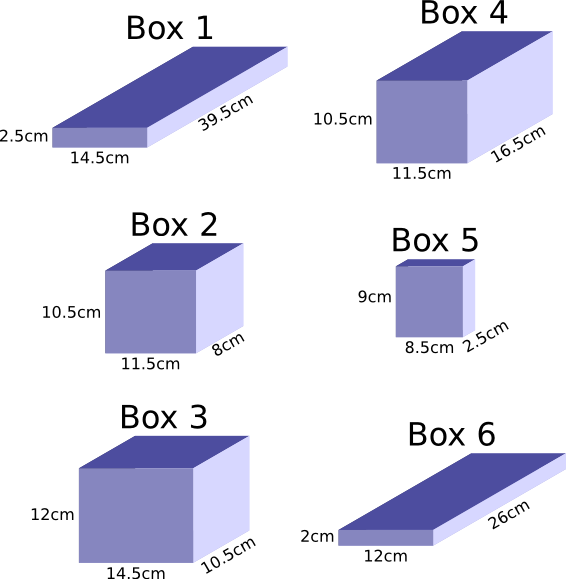
- Create the following boxes using cardboard, scissors and tape.
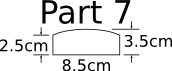
- Cut the below part out of cardboard:
- Cut the below part out of cardboard and roll into a cylinder - secure with tape.

- Cut 6 semi circles of 8cm diameter from the cardboard.
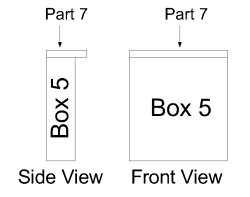
- Take box 5 and part 7 and stick together as below:
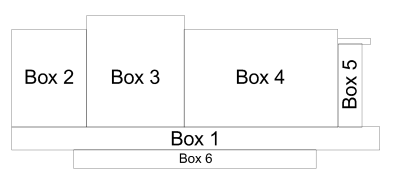
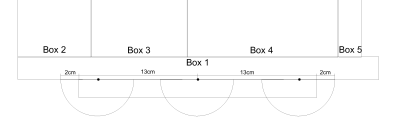
- Using the craft glue stick boxes 1, 2, 3, 4, 5 together, as below (centre each box about the center line of box 1 - lengthwise). After they are dry stick box 6 to the others.
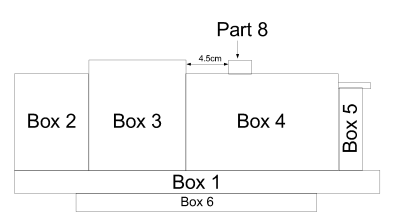
- Use tape to stick the cylinder of part 8 onto the shape created in the previous step.
- Apply a layer of paper mache to the shape that you have created. This is to give the shape a smoother look (you could skip this step if you wanted to).
- After paper mache is completely dry paint the box as per Salty's markings. Here are some images to help you get the markings right.
Side view of Salty
See here for an easy to use marking guide | 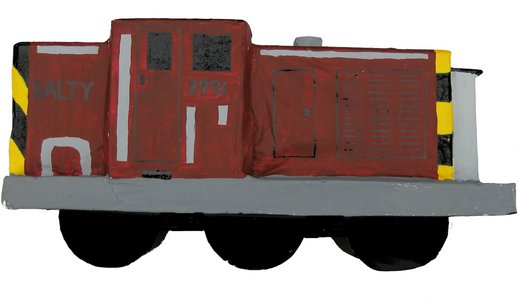 |
Front View of Salty
(the strips are about 2cm wide) | 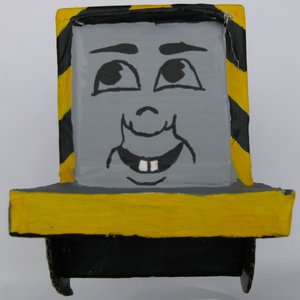 |
Back View of Salty
(the strips are about 2cm wide) | 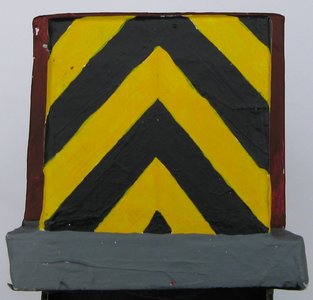 |
| Top View of Salty |  |
- Paint the semi circles (the wheels) the desired colour.
- Allow paint to dry.
- Stick 3 semi circles to the side of what was box 6 as below.
- Stick remaining three wheels on the other side of box 6 box.
- Draw on Salty's face using a black marker
- Use the texta to draw on Salty's Face (example)
Optional Bits
Coupling Salty
If you are creating coupling you will need:
- Curtain wire (approx. 5cm)
- Screw hooks (1)
- Gaffer tape
Instructions:
- Screw a hook into one end of the curtain wire.
- Use gaffer tape to attached the wire to the bottom of the truck - the hook should overhang at Salty's rear so the trucks can couple up to him.